This article describes my Pi-Hole setup which uses a docker container installed on a Raspberry Pi running Ubuntu Server ARM.
Download the latest version of Ubuntu Server 22.04: Ubuntu on a Raspberry Pi.
What you'll need
- A microSD card (4GB minimum, 8GB recommended) or USB drive.
- A Raspberry Pi 2, 3 or 4 (3 or 4 recommended highly)
- A wired ethernet cable for the Pi (we can't use Wi-Fi as we are going to bridge our LAN connection)
- Optionally a USB keyboard and monitor with HDMI interface
Install Ubuntu Server on your microSD card/USB drive
Let's become root:
$ sudo -i
Plug in your SD card or USB drive. Run lsblk to list the block devices connected to your computer and get the SD/USB drive device name.
Now we will pipe the output xzcat to dd to install Ubuntu Server onto our drive.
$ xzcat ./ubuntu-22.04.3-preinstalled-server-arm64+raspi.img.xz | dd of=/dev/sdb status=progress

4161074688 bytes (4.2 GB, 3.9 GiB) copied, 46 s, 90.5 MB/s
8353792+0 records in
8353792+0 records out
Alternatively, you can use something like Raspberry Pi Imager or Gnome Disks to write the image to your drive if you're not comfortable on the command-line.
Once you've written it your drive, eject it and plug it into your Pi. Make sure you have connected an ethernet cable as well, as we'll now need to continue the setup over SSH.
Power up and connect to your Pi
First thing we'll need to do is get the IP address of the Pi. You can get this by logging into your router and going into the DHCP settings and finding the address:
 )
)
You can also find it listed in the ARP tables by running:
$ arp -av
router.local (192.168.88.1) at 4c:5e:xx:xx:xx:xx [ether] on enp4s0
pi.local (192.168.88.252) at e4:5f:xx:xx:xx:xx [ether] on enp4s0
If you're still unable to find the IP address, you'll need to hook a monitor and keyboard into your PI and reboot. Once rebooted, log in using the default username and password of 'ubuntu'), then run ip -a to get the IP address.
Now that we have the IP address, let's log in using SSH, as stated, the default username and password is 'ubuntu'. Upon first login, it will ask us to change our password, then log us out:
$ ssh [email protected]
[email protected]'s password:
Welcome to Ubuntu 22.04.3 LTS (GNU/Linux 5.15.0-1034-raspi aarch64)

 * Documentation:  https://help.ubuntu.com
 * Management:     https://landscape.canonical.com
 * Support:        https://ubuntu.com/advantage

$
The first thing we'll want to do is change the default password, so run passwd and set the password to something long and complicated. If you have an SSH keypair, now would be a good time to use ssh-copy-id to copy it onto the server. Once you've changed your password, let's install Cockpit so we can adminster our Pi through a web interface:
sudo apt update
sudo apt install cockpit-*
We use the wildcard here to install all of the goodies and addons that Cockpit has to offer. If you'd prefer a leaner install, you can get away with just installing cockpit and cockpit-podman.
Now lets fire up a browser and login to cockpit.
Installing the Pi-Hole Container through cockpit-podman
In your web browser of choice, head to:
https://(your Pi's IP address):9090
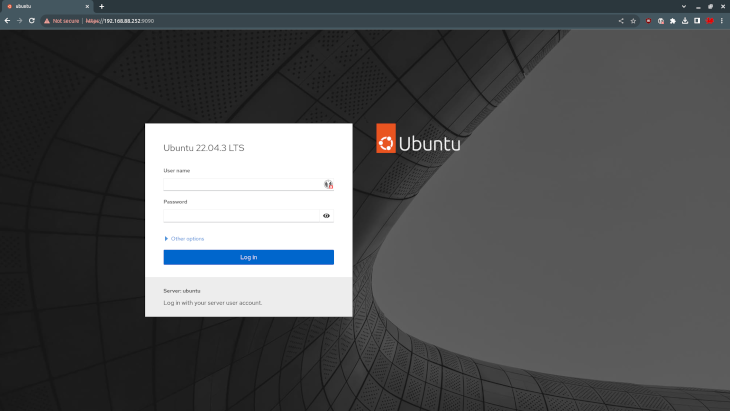
You should be presented with a screen that looks something like:
If you don't make sure Cockpit is running:
$ sudo systemctl start cockpit
Log in to Cockpit using the details we used for SSH. Once you're logged in, click on the "Turn on adminstrative access" link in the blue text box.
 )
)
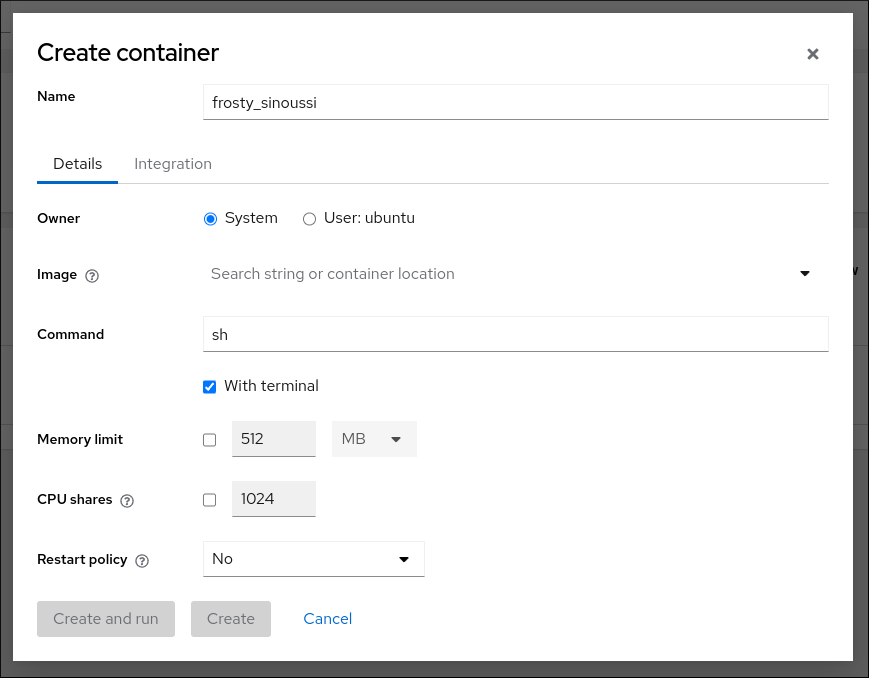
Now we need to click on the "Podman containers" link on the right hand side. On the podman page, click the "Create container" link in the blue text box. You should be presented with a pop-up box that looks like this:
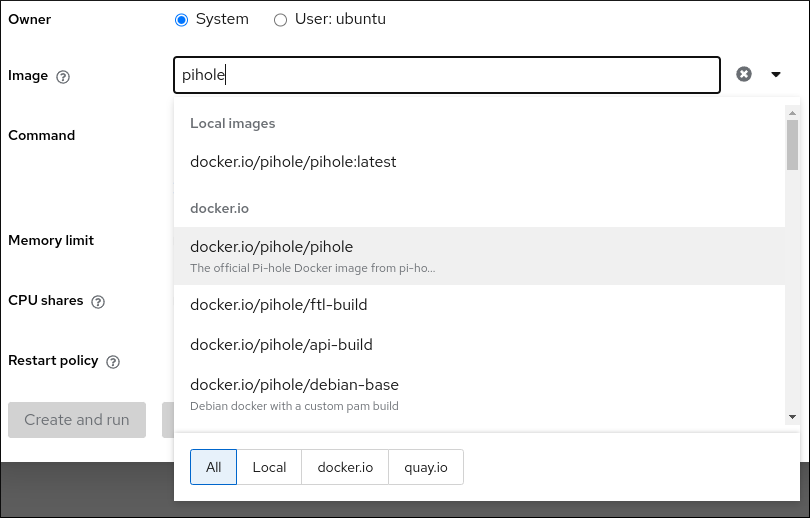
In the "Image" field, type 'pihole'. Podman will then search on docker.io and quay.io for a container image of pihole. When the results come back, we need to choose 'docker.io/pihole/pihole', which is the official Pi-Hole Docker image.
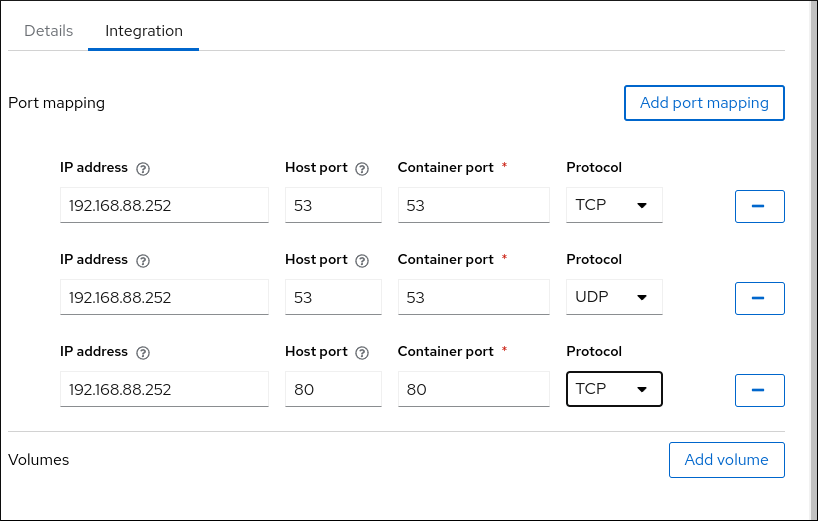
Podman is around 98% compatible with Docker containers, but we do need to do a bit of manual labour for that final 2%. Click on the 'Integration' Tab. We need to add port mappings, so when someone connects to our Pi, on the designated ports, it will pass them through to our Pi-Hole container. To add a new line, press "Add port mapping" after entering the details.
We need to map:
- Port 53/tcp -> 53/tcp
- Port 53/udp-> 53/udp
- Port 80/tcp -> 80/tcp
You can leave the IP address blank, or enter it if you'd like. But note, if your Pi ever changes IP address, your container will stop responding. If you're entering the IP, make sure it's static, either by adding a permanent lease through your DHCP server, or by editing the netplan config file on the Pi.
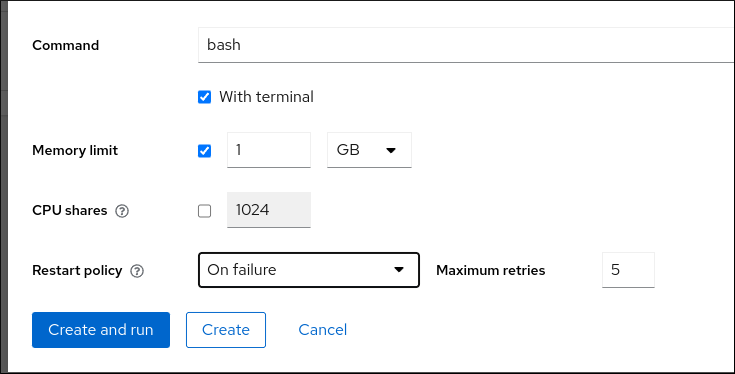
Once you've mapped the required ports, go back to the 'Details' tab. Make the following changes:
- Command - change to
bash - Memory limit - change to 1 GB. It's just a DNS server with a web interface, so that will be plenty
- Restart policy - change to 'On failure', and '5 retries'
And that should be everything we need. Hit the 'Create and run' link in the blue text box.
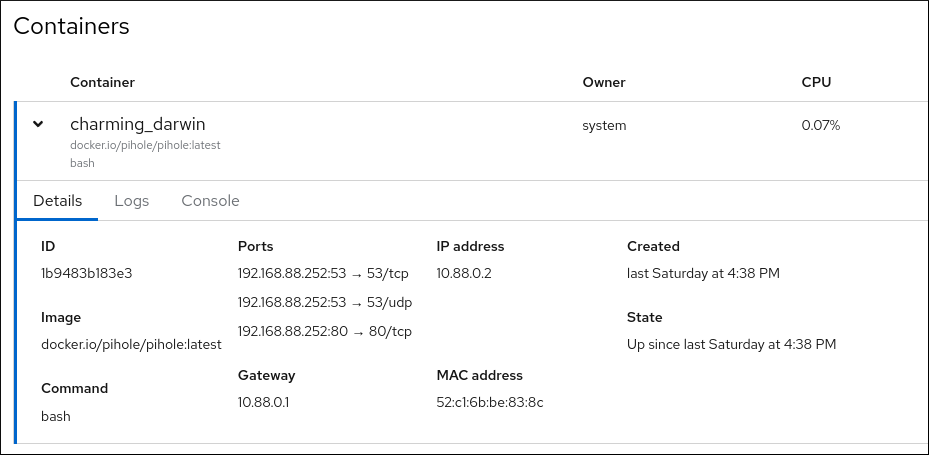
Podman will now pull the latest Pi-Hole container from docker.io, and after a few minutes, you should see a Container appear, and if you press the the arrow on the left hand side of the Container name, it will show you the details. It should look like this:
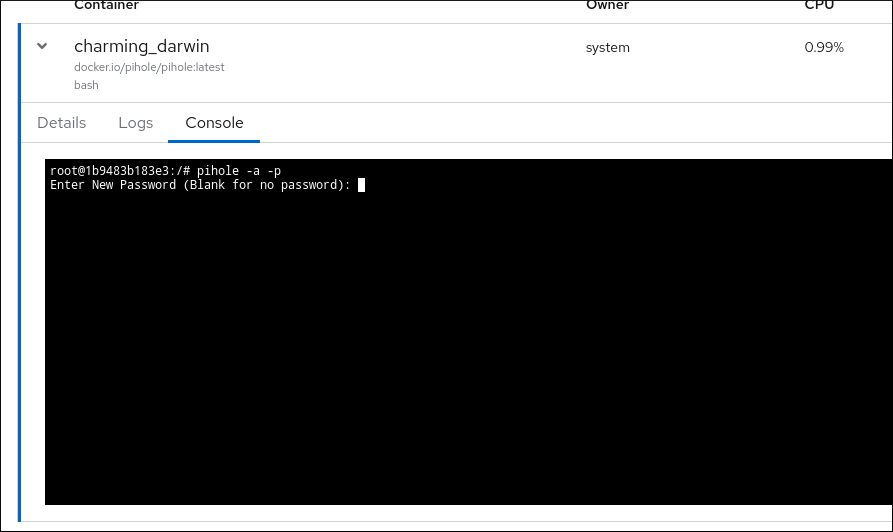
The final step in Podman is to set the Pi-Hole admin password. So in the Container details, click on 'Console', then run:
$ pihole -a -p
This will prompt you for an admin password for the web interface.
Setting up Pi-Hole
Open a new tab, and head to:
http://(your Pi's IP address):80/admin
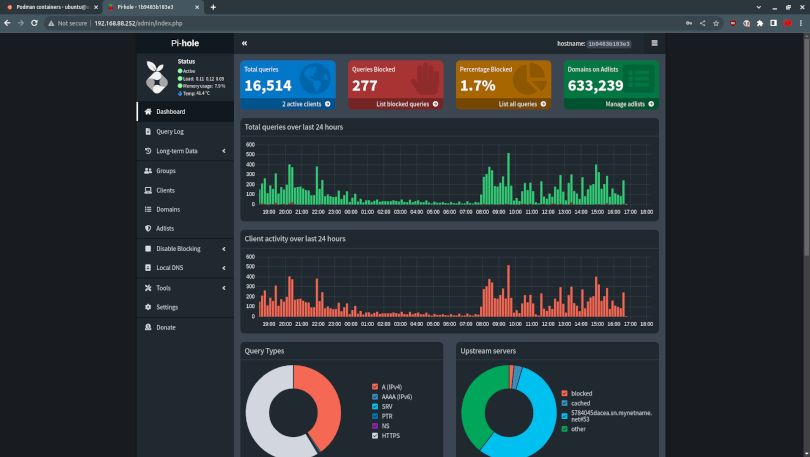
You should be presented with the Pi-Hole admin login page:
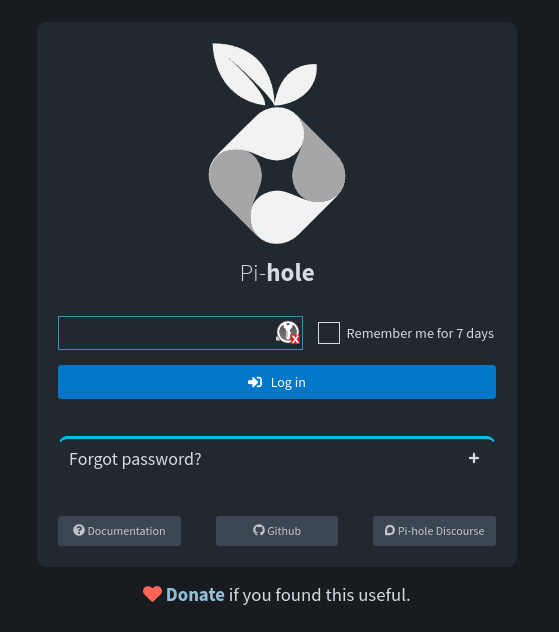
Login using the admin password that we just set in Podman, and you'll be presented with the rather sexy Pi-Hole dashboard (yours won't look like mine yet).
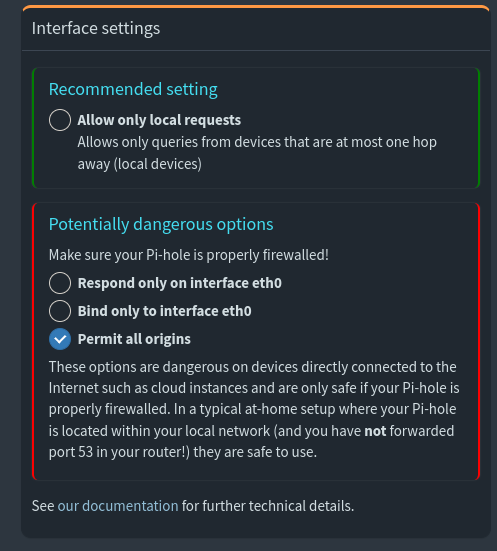
We need to change a few settings, so click on the 'Settings' link on the left-side menu. In the Settings page, click on the 'DNS' tab at the top.
Because we're running Pi-Hole in a Container, we need to change the 'Interface settings'. In the 'Potentially dangerous options', choose 'Permit all origins'. It's safe to do this, as our Pi isn't (or it shouldn't be!) an edge device.
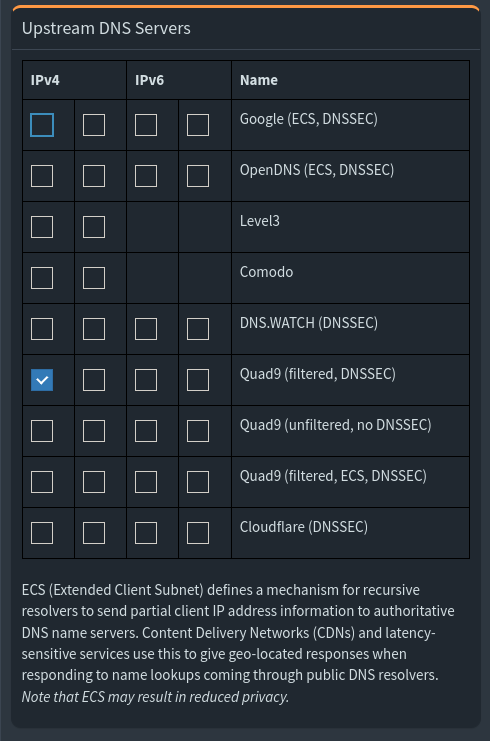
And finally, choose an Upstream DNS server. I'm not going to vouch for any of them, you'll need to make an informed choice. If you prefer, you can enter your ISP's DNS IP addresses in the Custom boxes on the right.
Job done
And that's it. Wasn't so hard was it? The only thing you have left to do now, is to make sure your devices are using the Pi's IP address for their DNS server.
You can do this by changing the DHCP settings on your router (consult the manufacturer's manual for your router for precise advice on this), or you set it individually by editing the network settings on your devices, and choosing a manual DNS server.
I really hope this helps! If you'd like watch me do this on video, I've embedded a YouTube video below for your viewing pleasure.
Tools used
- Ubuntu Server ARM 22.04.03 LTS
- Cockpit >= 264
- Podman>= 3.4.4
- Pi-Hole Docker container Latest pull from docker.io
